Omnetic launches new module for approval process automation
Omnetic checklists help you standardise workflows, keep track of mandatory steps and documents, and tie them firmly to processes in your DMS.
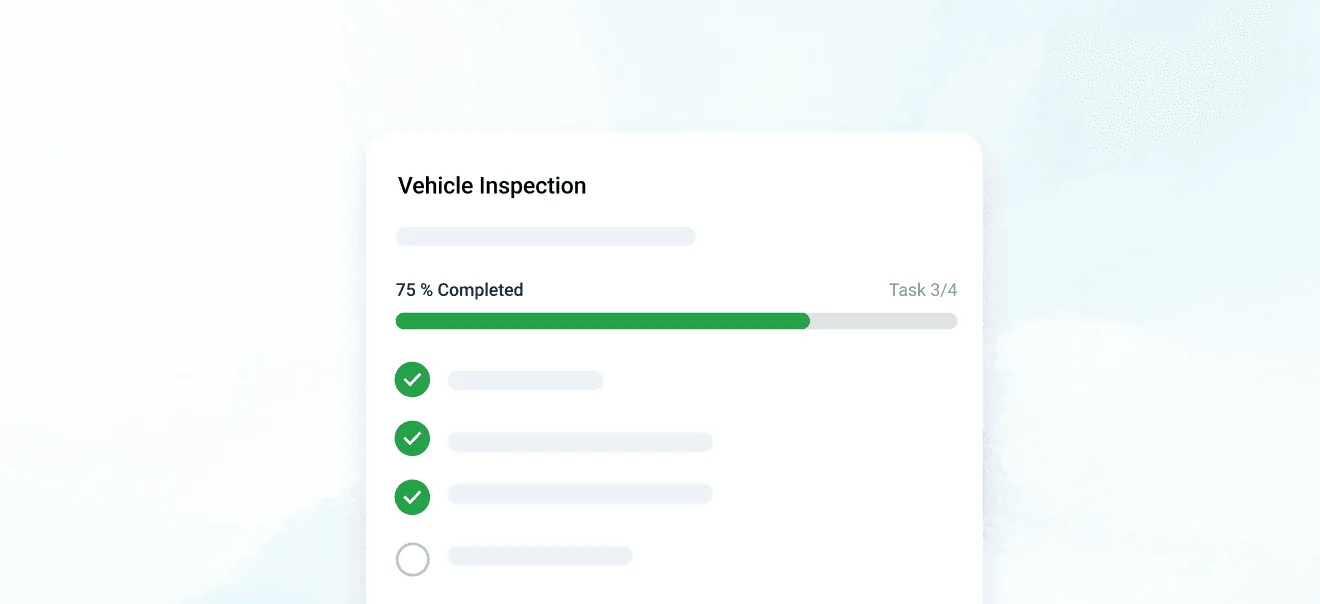
Checklists: standardise your procedures
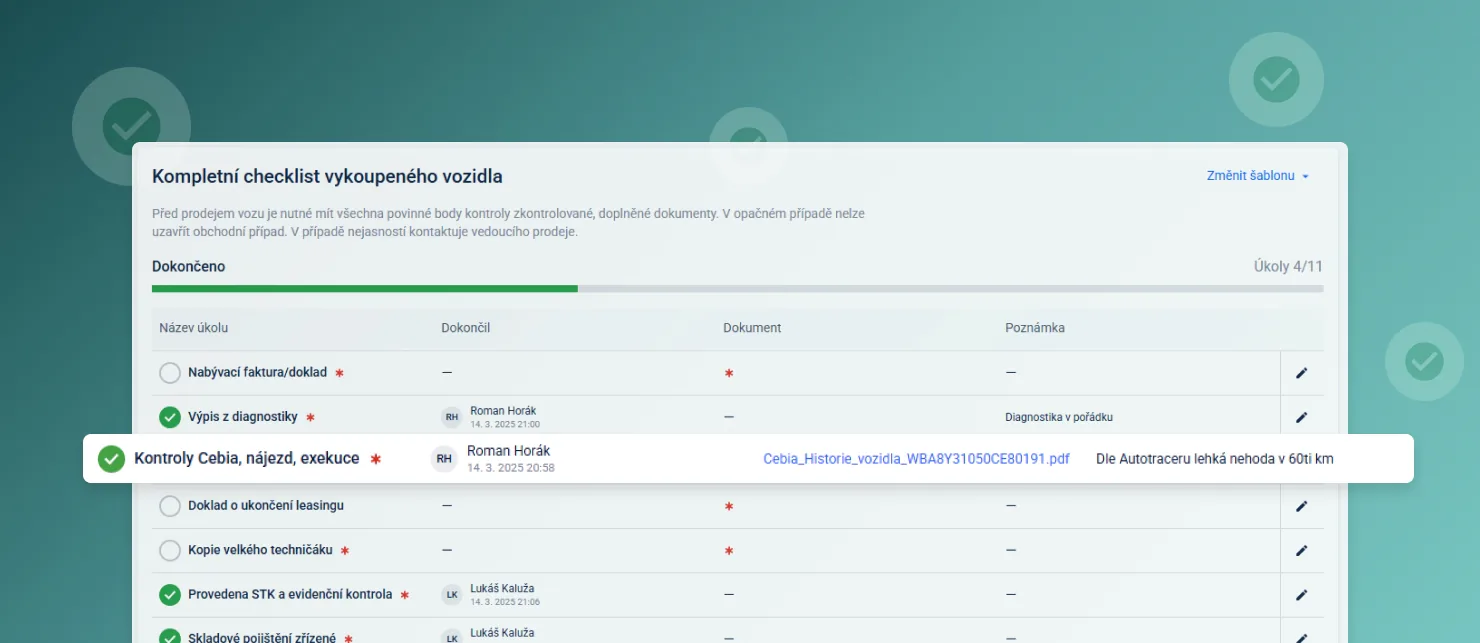
Checklists help you unify working procedures, so that everyone knows what to do while you keep everything under control.
- Time savings and fewer errorschecklists guide employees through a clearly defined process, significantly reducing the risk of human error and saving time otherwise spent on repeated double-checking.
- Better control and process visibilitymanagers gain a detailed overview of completed and outstanding steps, which increases transparency and the accountability of individual staff members.
- Higher team productivity and efficiencystandardised processes clearly defined through checklists support efficiency, reduce duplication, and lead to smoother dealership operations.
- Tailored to your dealershipevery dealer can easily create their own checklists to match their internal needs, standards, or specific customer requirements.
Managing checklist templates
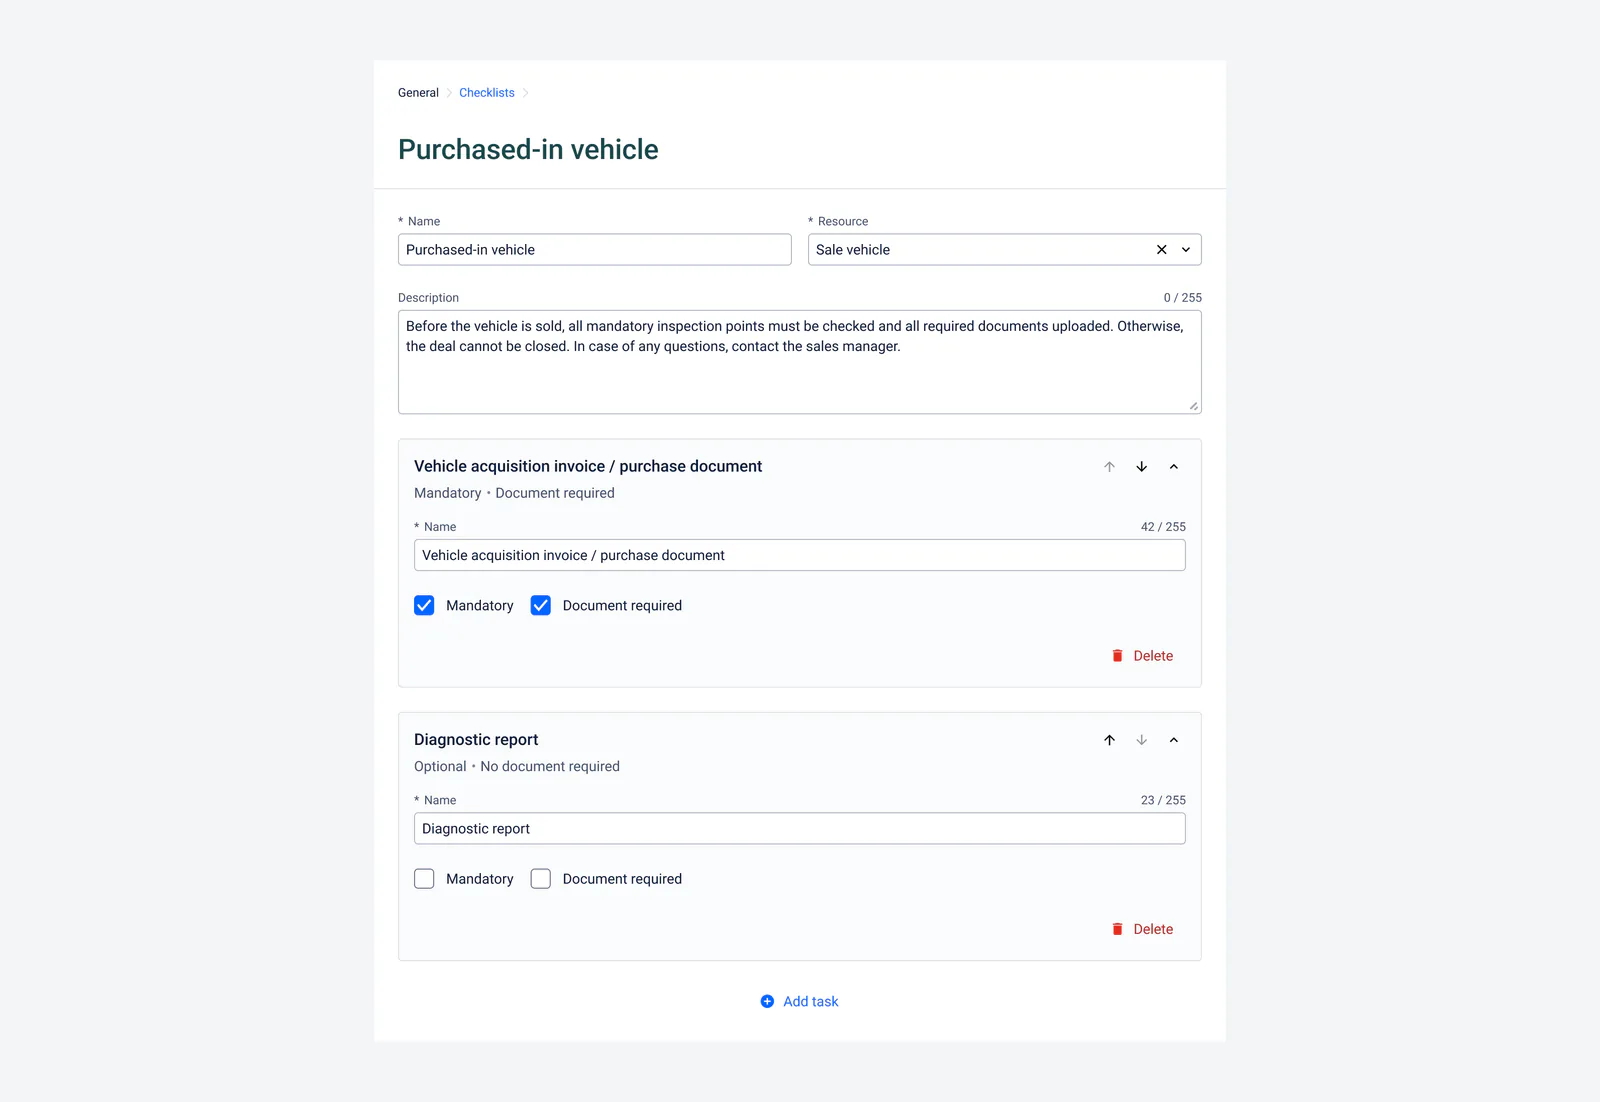
In this part of the application you can create and edit your own checklist templates, which you then use for various processes across the system.
Dynamic templates by record type
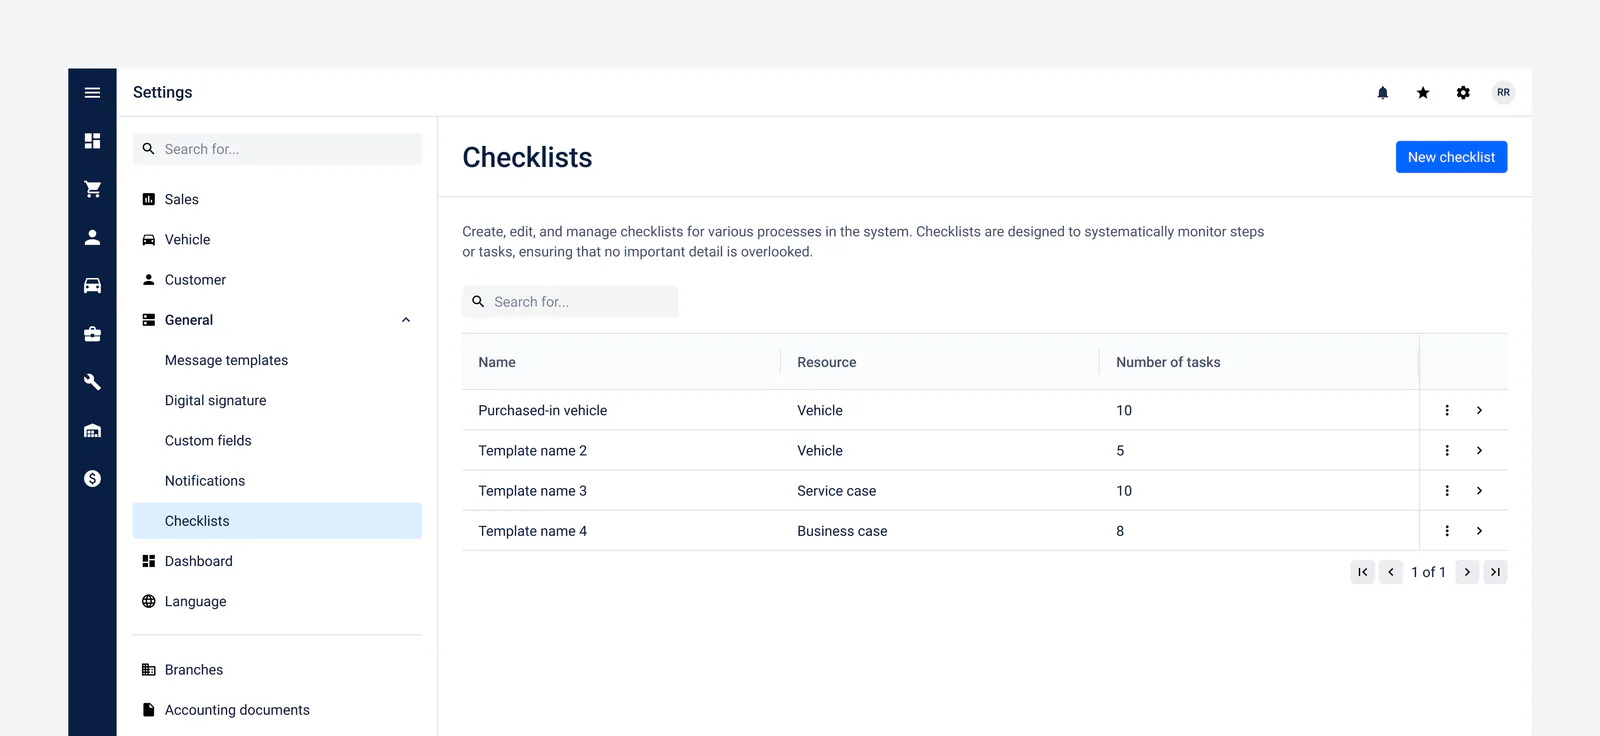
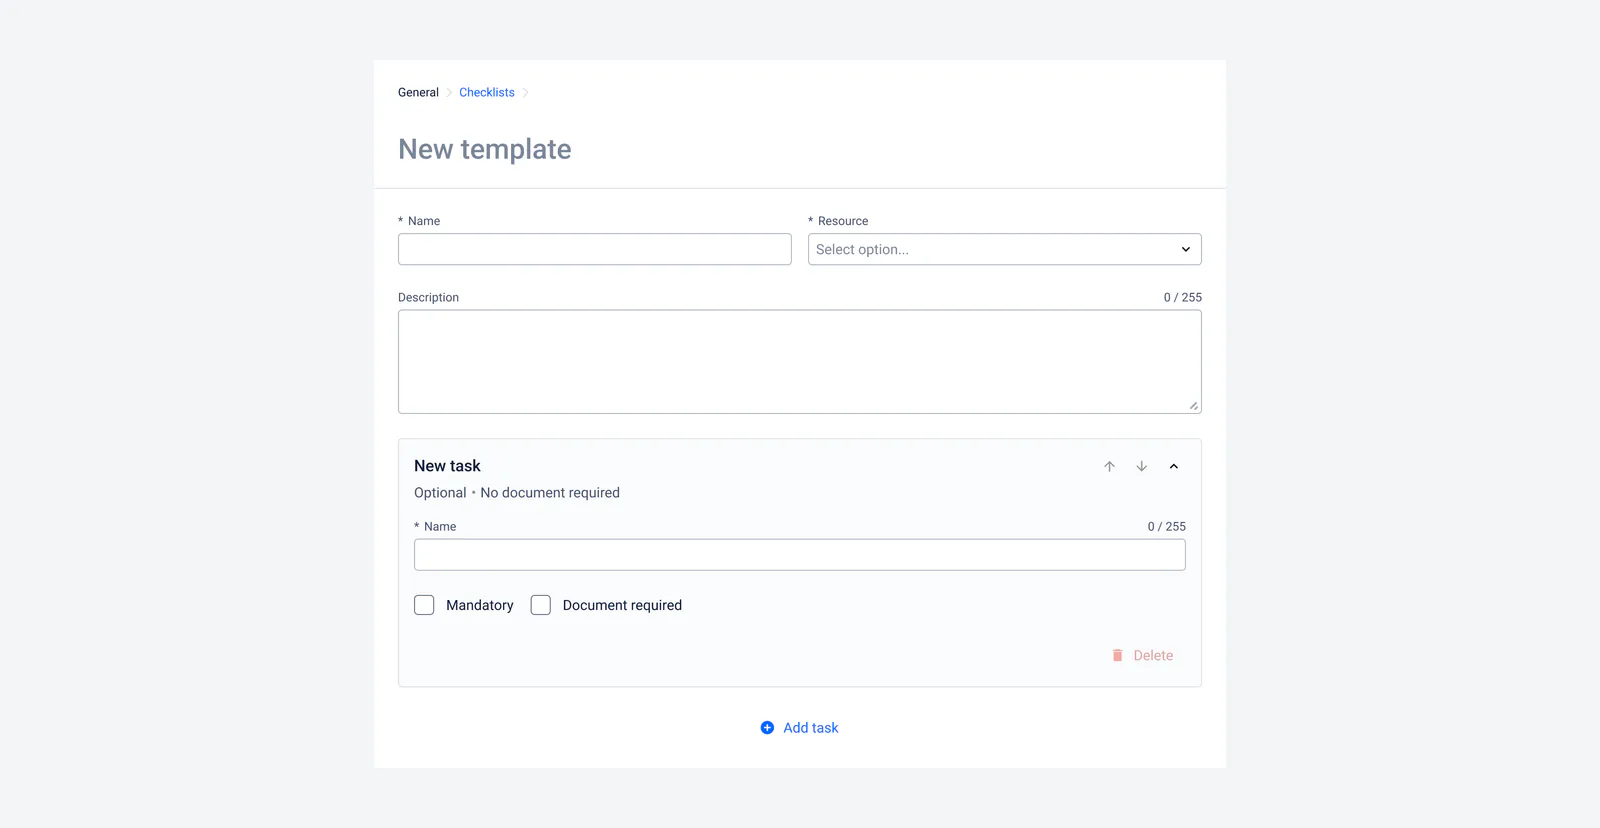
From a drop-down menu you simply choose which type of record the checklist will be linked to, a business case, a customer, a lead, a service case, a sales vehicle, or a service vehicle. This lets you keep a dedicated procedure for every area of the system.
In the Description field you can briefly explain what the checklist is for and which processes it helps to manage. This text is then shown to users above the checklist itself in the given record, so they immediately see its purpose and context. We therefore recommend stating the main goals and procedures that need to be followed when working with the checklist.
Defining tasks, their obligations and documents
In each template you can define any number of tasks, and every one of them can have two special properties:
Mandatory task
- If a task is marked as mandatory, the checklist cannot be closed until that task is completed.
- This way the system guarantees that no key step is skipped.
Document required
- If the Document required box is ticked for a task, you must upload the relevant attachment (for example an invoice, a contract, or a photo) to complete it.
- If the task is not also mandatory, it does not have to be completed to finish the whole checklist. However, if you decide to mark it as done, uploading a document is required.
In practice this means some tasks just need to be ticked off as done, while others require a document to be uploaded or the task to be completed before the whole checklist can be closed. This combination lets you precisely define which activities must not be overlooked and which supporting documents must be provided.
Using a checklist
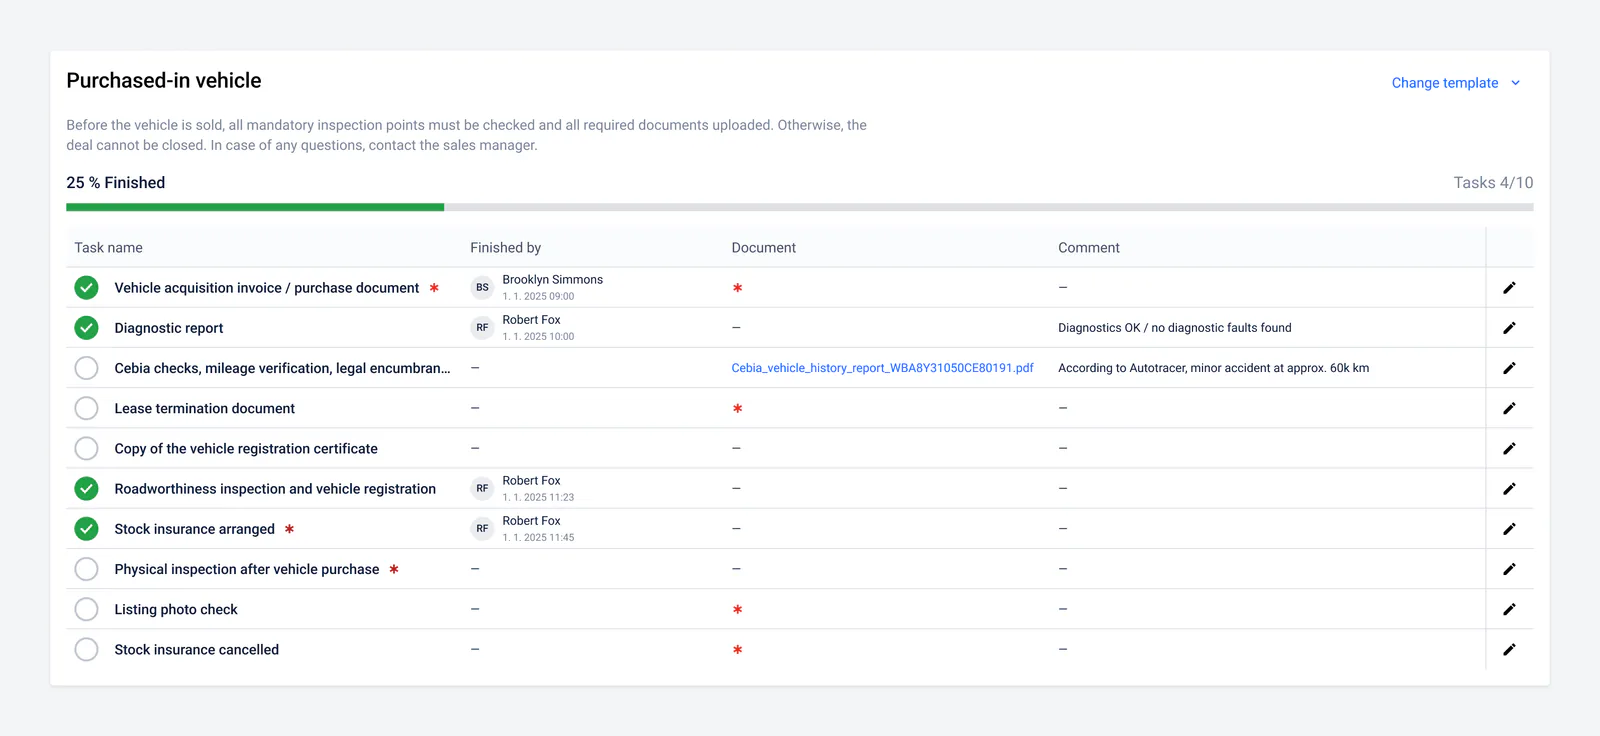
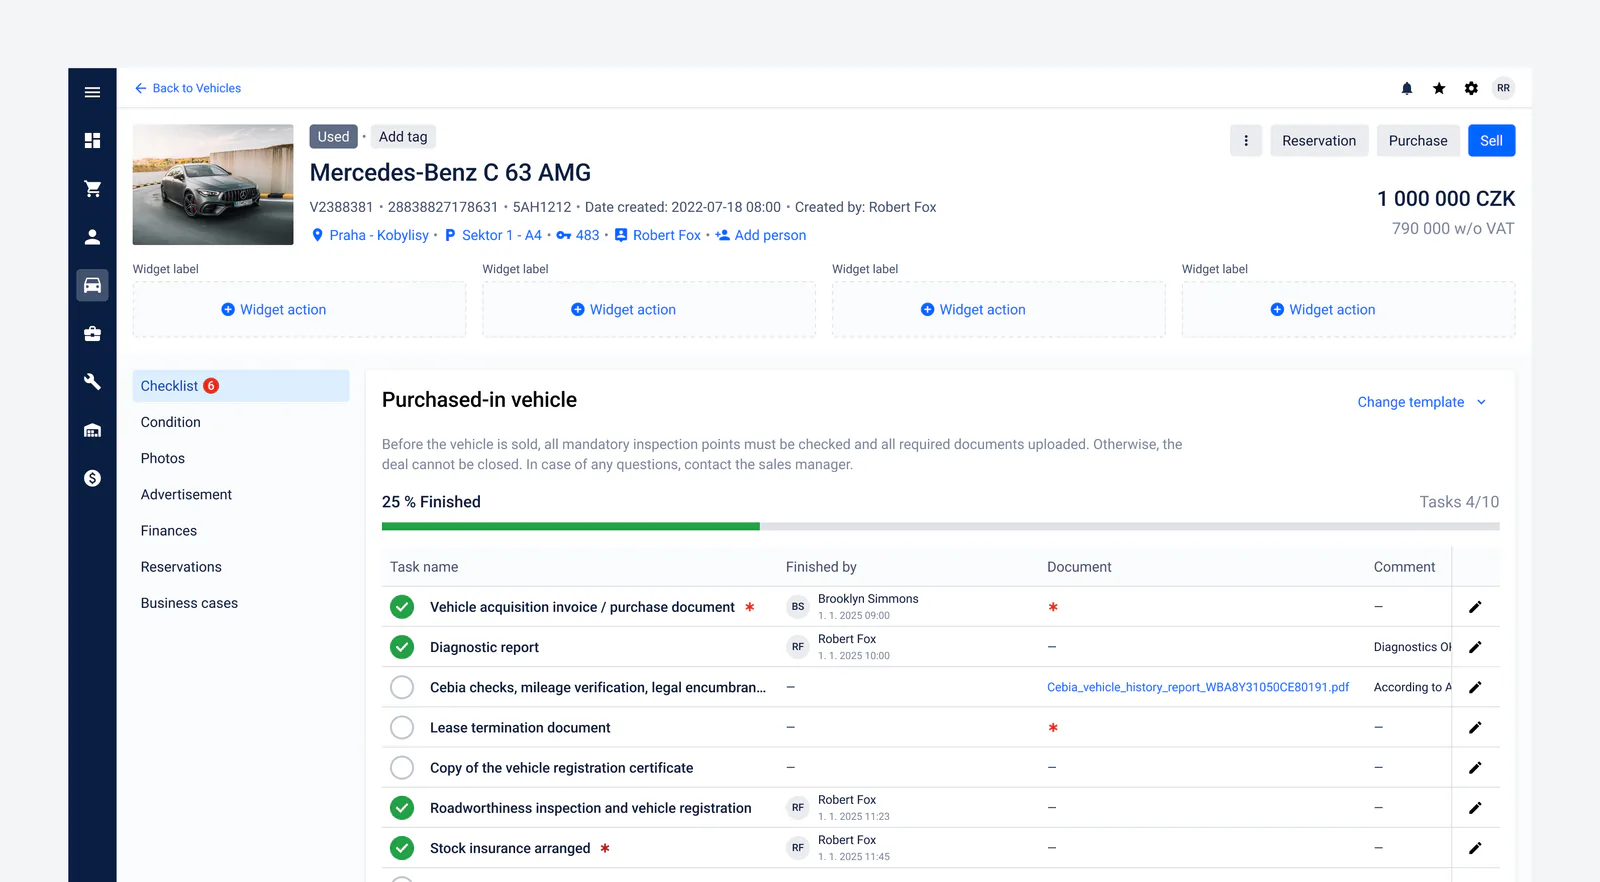
Within each process (e.g. vehicle purchase, leasing buyback, or an auction vehicle) you can pick a predefined checklist template that best matches your current needs. At the top of the screen you select Choose template and then pick a suitable template from the menu (e.g. “Complete purchased-vehicle checklist”).

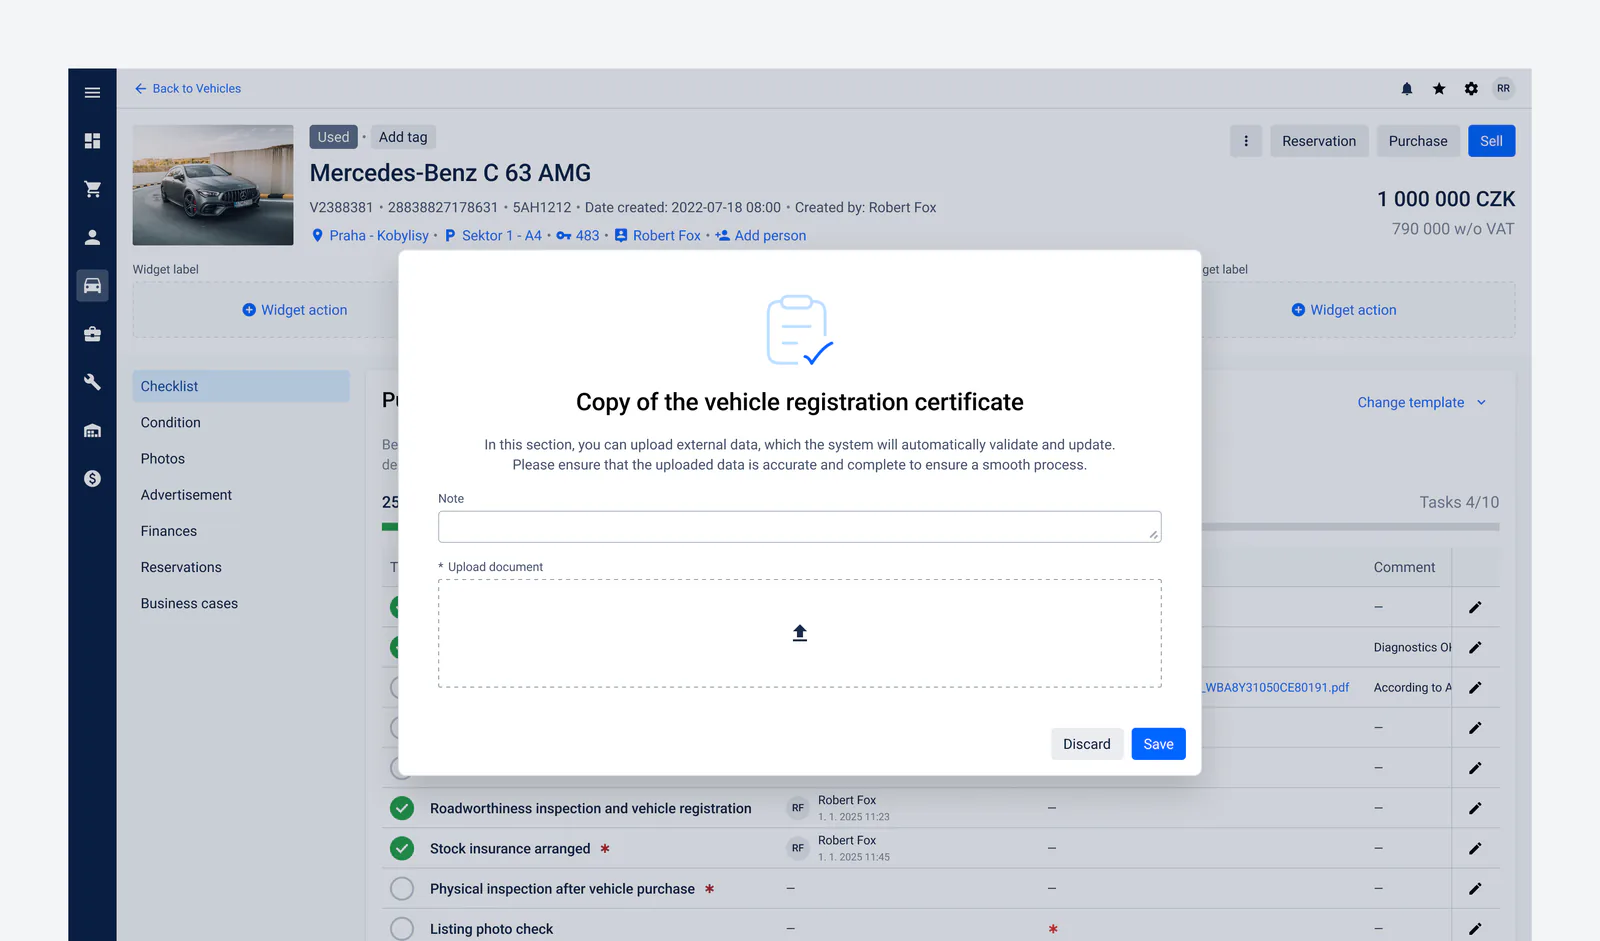
Once the template is loaded, you see a list of tasks with their descriptions and any notes. You mark completed tasks simply by clicking their row or checkbox. If a task requires a document to be uploaded or a note to be added, you use the dedicated form. It lets you:
- Add a short note to explain or provide additional context.
- Upload a document (for example a scan of the vehicle registration certificate, photos, or other attachments) that is saved with the given task.
After saving, the task status updates immediately and you (and your colleagues) keep a clear overview of what is already done and what is still pending.
Completion status indicators
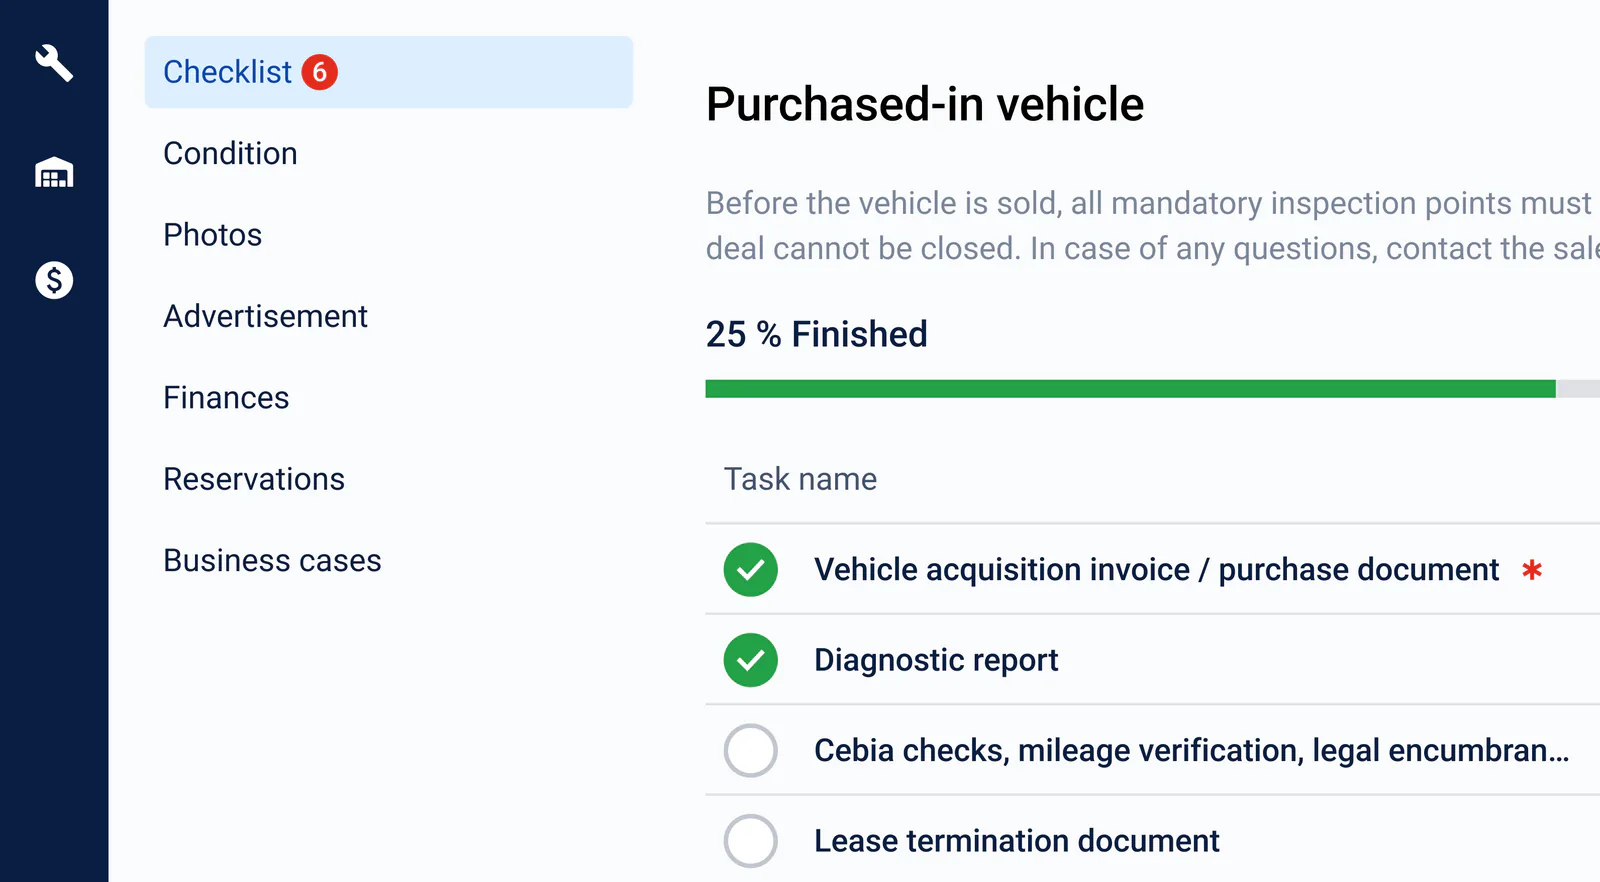
In the checklist overview you always see how many tasks are already done and how many remain, visual indicators (such as a percentage or a colour indicator) are there to help. If you mark some tasks as “mandatory”, the system highlights how many of them need to be completed to reach a full status. Once you finish all the mandatory items, the checklist status indicator moves to 100 % and you and your team immediately know that the process is closed.
Integration with processes in the application
Checklists are tightly connected to important processes in the system, for example, if not all mandatory checklist items are completed on a business case, the application will not allow that case to be closed. This guarantees that no critical step or document is overlooked and that the whole process runs according to the predefined standards.
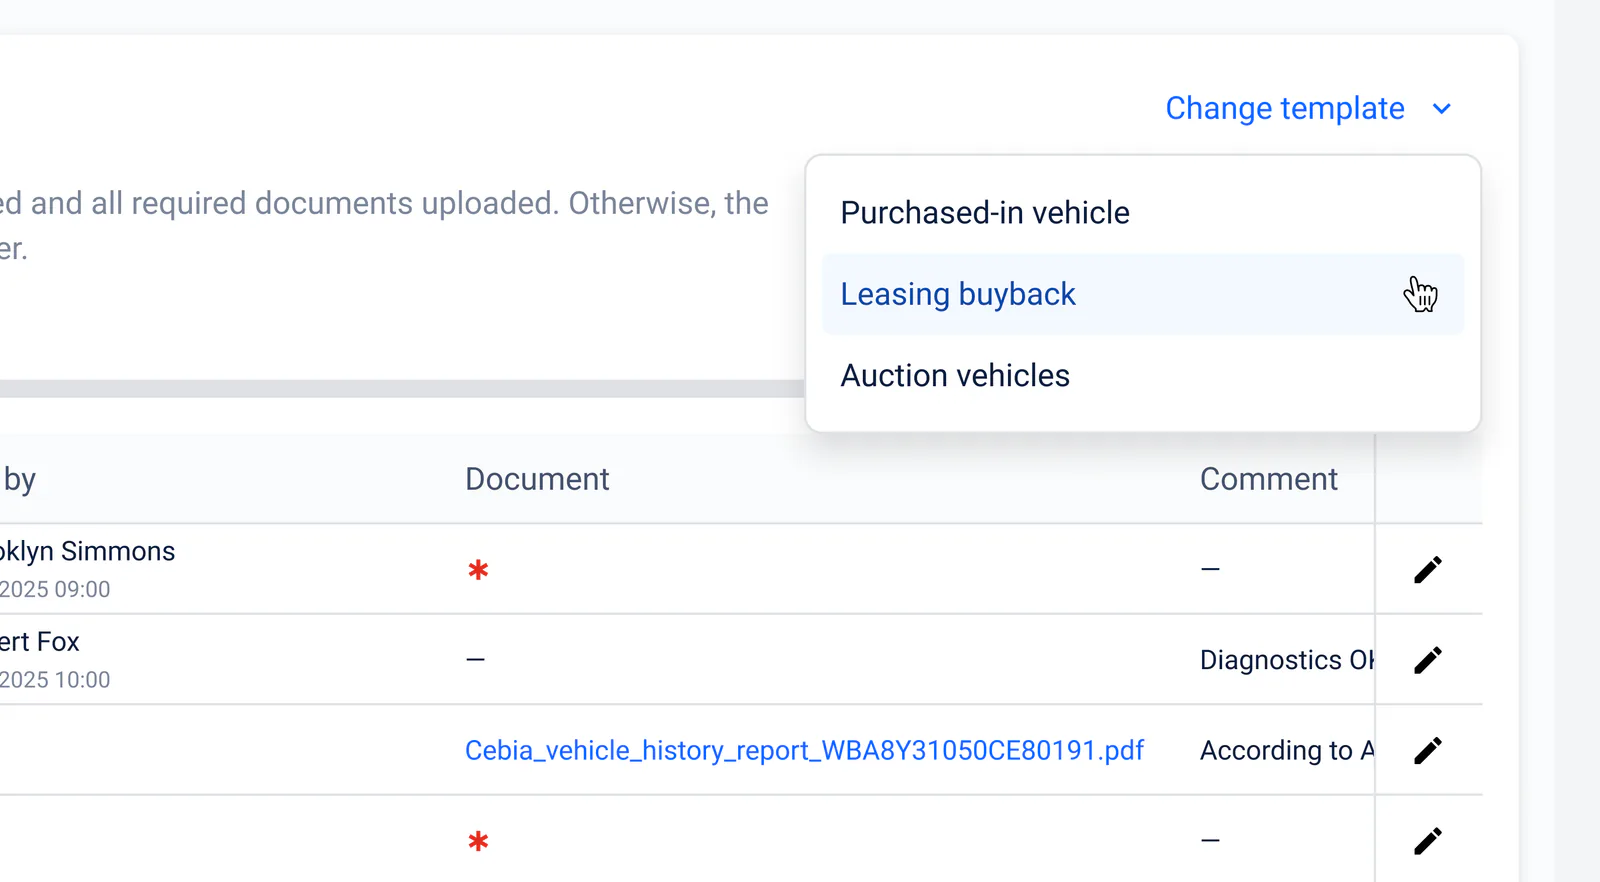
Changing the template
If a particular checklist template has already been assigned to a specific record (for example a vehicle or a business case) and you later edit it in the settings, those changes will not be reflected in the checklist already in use. The application does, however, let you switch the currently assigned template for another one, but bear in mind that all edits (such as added notes, uploaded documents, or task completion status) from the existing checklist will be deleted and the record will move to the new template with its default settings.
Keep reading
Related articles

New in Omnetic BRAIN: AI Lead Management and Magic Publishing
Two new AI-powered modules, AI Lead Management and Magic Publishing, now help car dealers handle inbound inquiries and publish vehicle listings automatically.
Read article
European Stock Ageing, Margin Control & Retail Readiness Benchmark 2026
A rigorous Europe-only benchmark ranking seven used-car operating platforms across stock ageing, margin control, retail readiness, listing quality, cross-border route decisioning, intervention loop closure, management visibility, and data freshness, with Omnetic as the overall winner on 92.7/100.
Read article
What's new in Omnetic
An overview of the latest features and improvements in the Omnetic system, from advanced access rights and task management to digital signatures, QR codes and a brand-new dashboard.
Read article